
Live Preview#
Let’s plan the route all over again — but this time, we’ll approach it with a bit more care and attention to detail.
Activating Live Preview#
Open the plugin again, and this time click the Live Preview checkbox located below the other buttons on the left-
hand side.
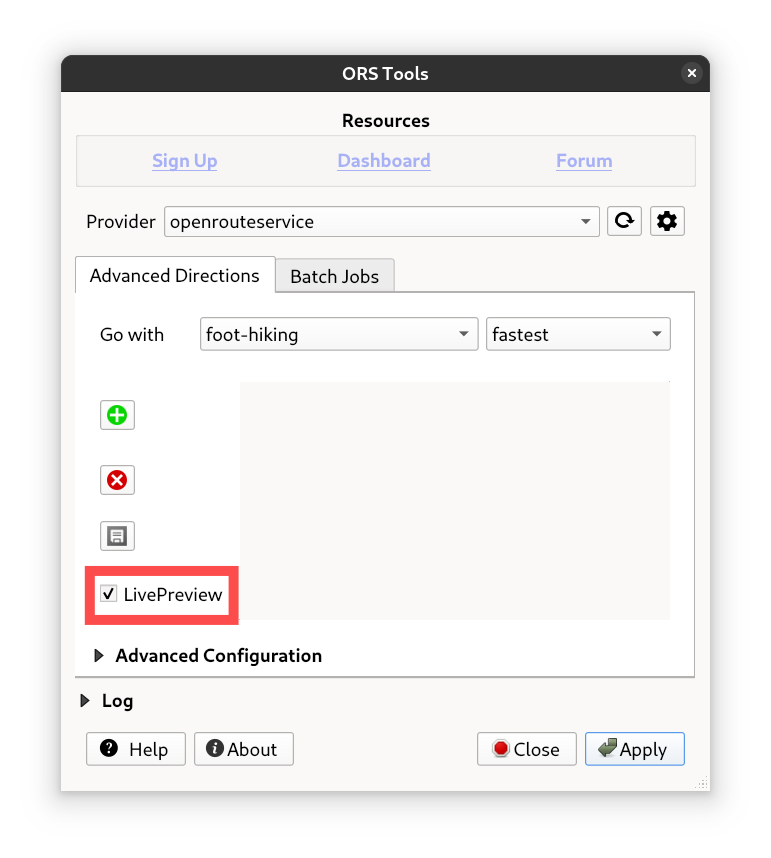
Fig. 12 Activate live preview#
Live Preview Digitizing#
Now do some more digitizing on the map—this time you’ll be able to see the route update instantly in the live preview as you add or move waypoints.
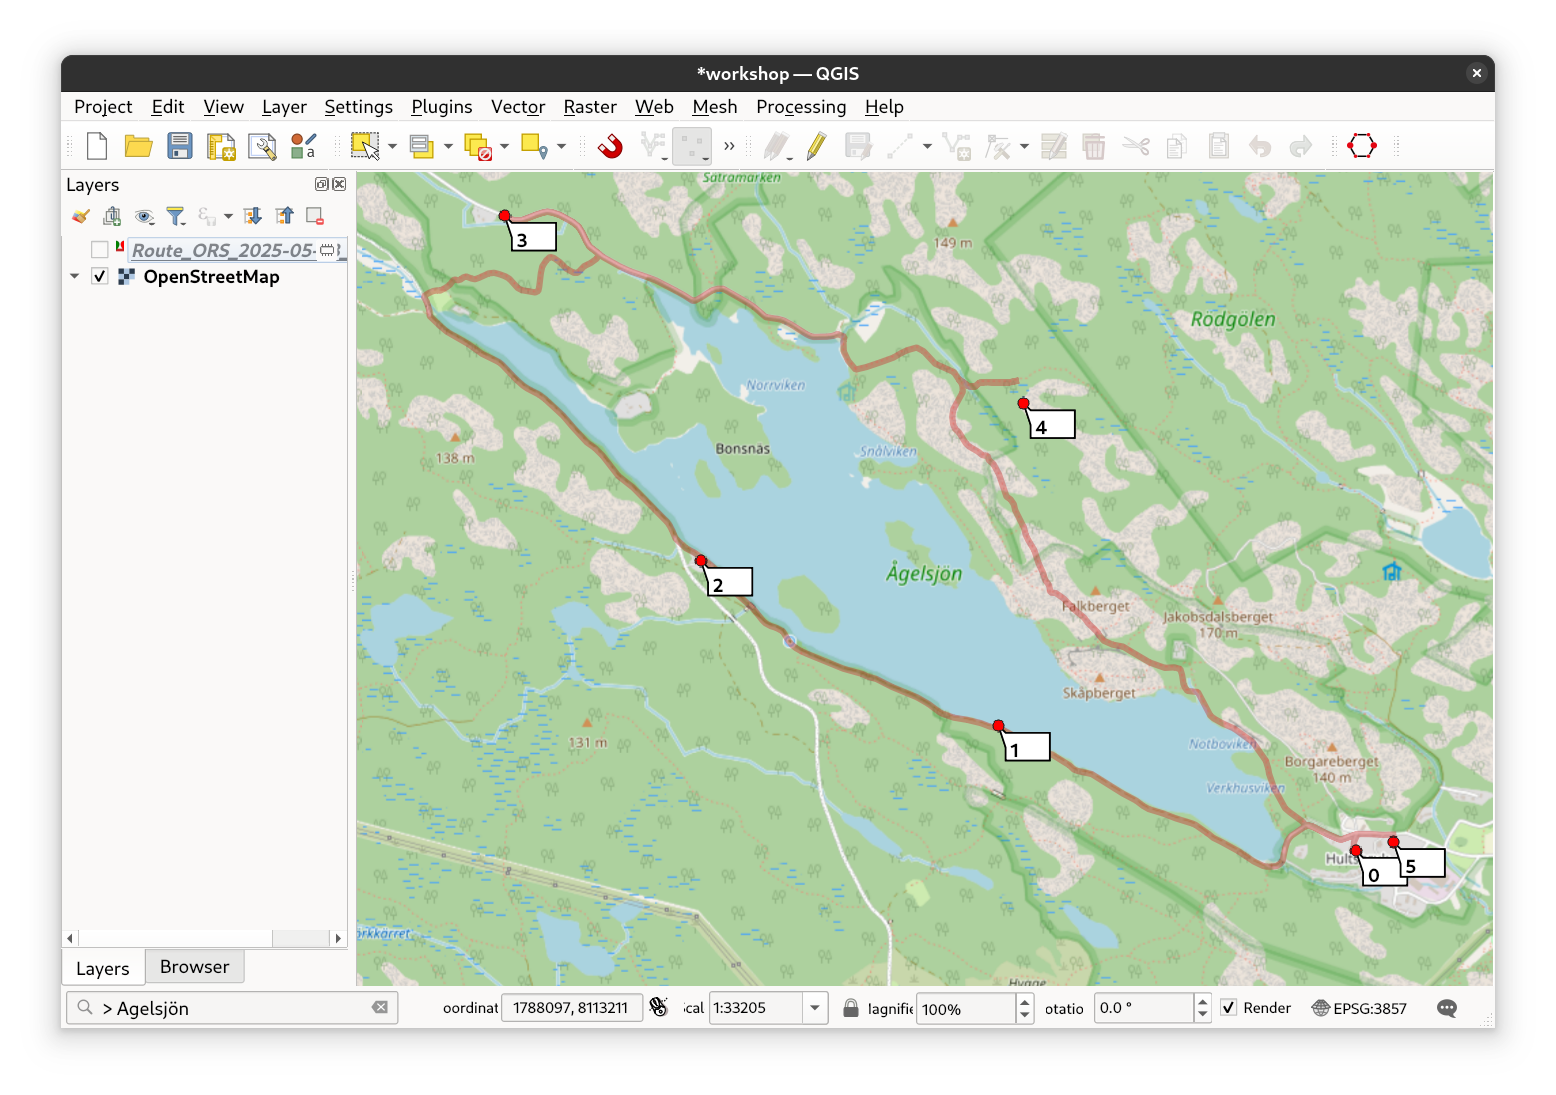
Fig. 13 Digitize with the live preview#
Drag and Drop#
If you’re unhappy with the position of a point, simply drag and drop it to the desired location on the map to adjust
the route easily. The dragged point will then change to a yellow color, indicating that it’s now the selected point.
If you want, you can delete it by pressing the d key on your keyboard. You can keep digitizing as long as the map
tool is active. Re-open the interface by right-clicking, pressing Ctrl+R or by pressing the plugin icon. Discard
changes by pressing Esc.
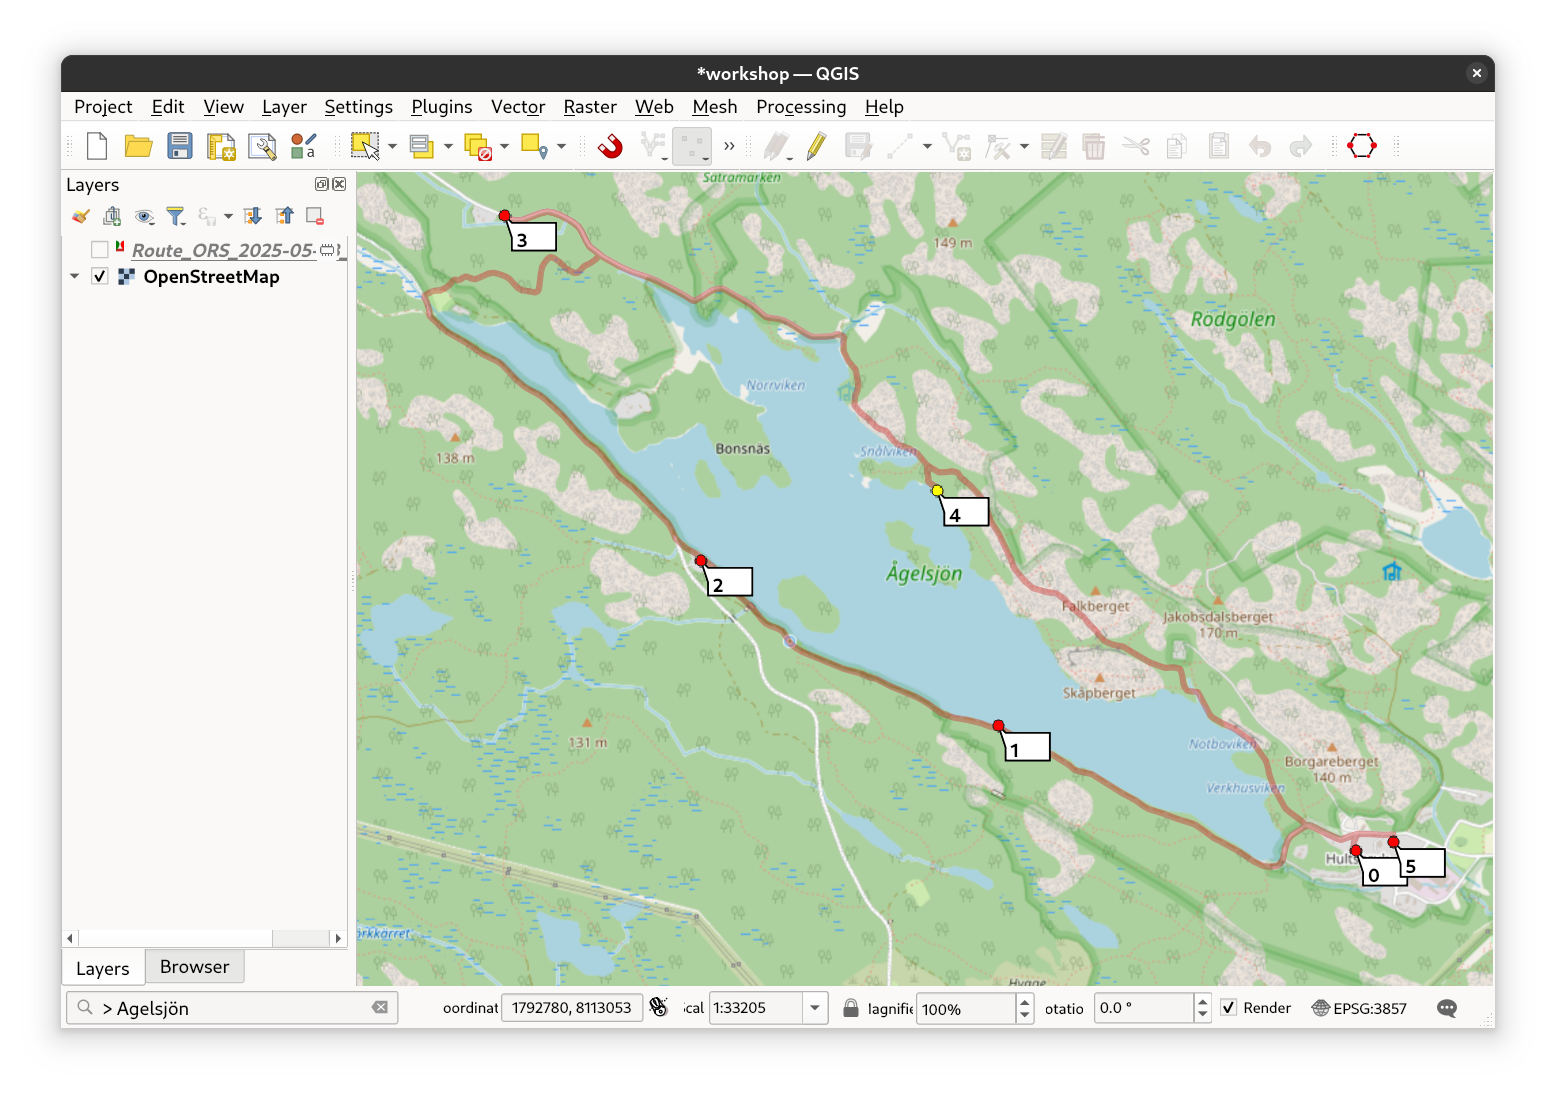
Fig. 14 Drag and drop#

Fig. 15 Delete a point by pressing the d key#
Try Different Route Preferences and Profiles#
Show the plugin dialog again, then explore different route profiles and preferences to see how the route changes based on your choice. The route on the map will update automatically. You can also drag and drop the points in the list of the plugin and thus change their order.
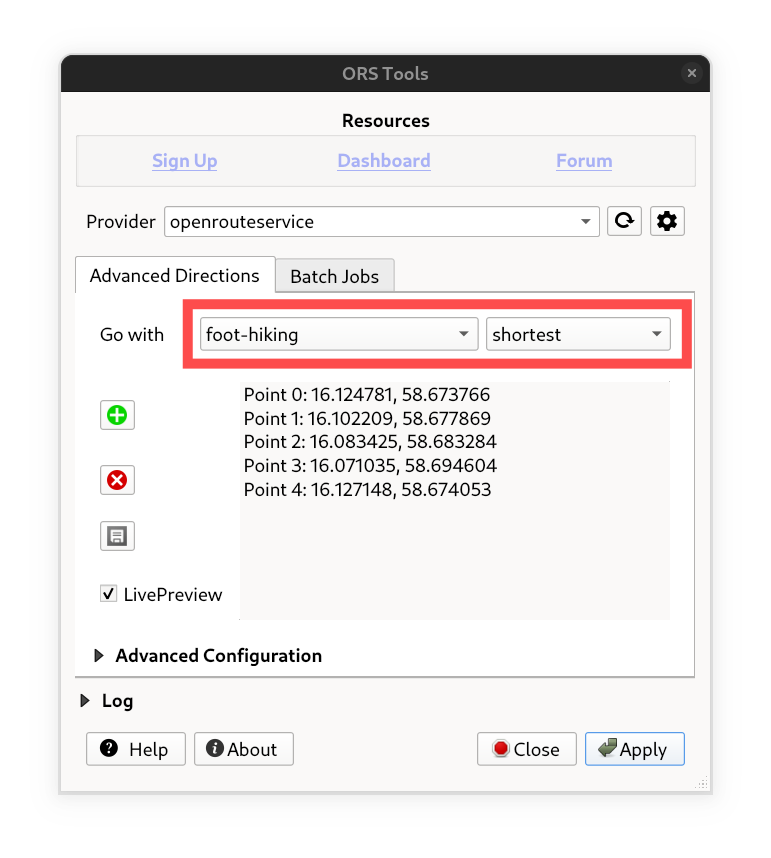
Fig. 16 Choose a routing profile and preference#
Optimization#
The openrouteservice also offers optimization capabilities to solve round trip problems (Traveling Salesman Problem). To use this, delete your last destination point and toggle the Traveling Salesman option under Advanced Settings. The route will then loop around the lake and return to your starting point. Feel free to try out the different optimization options to see how the route adapts!
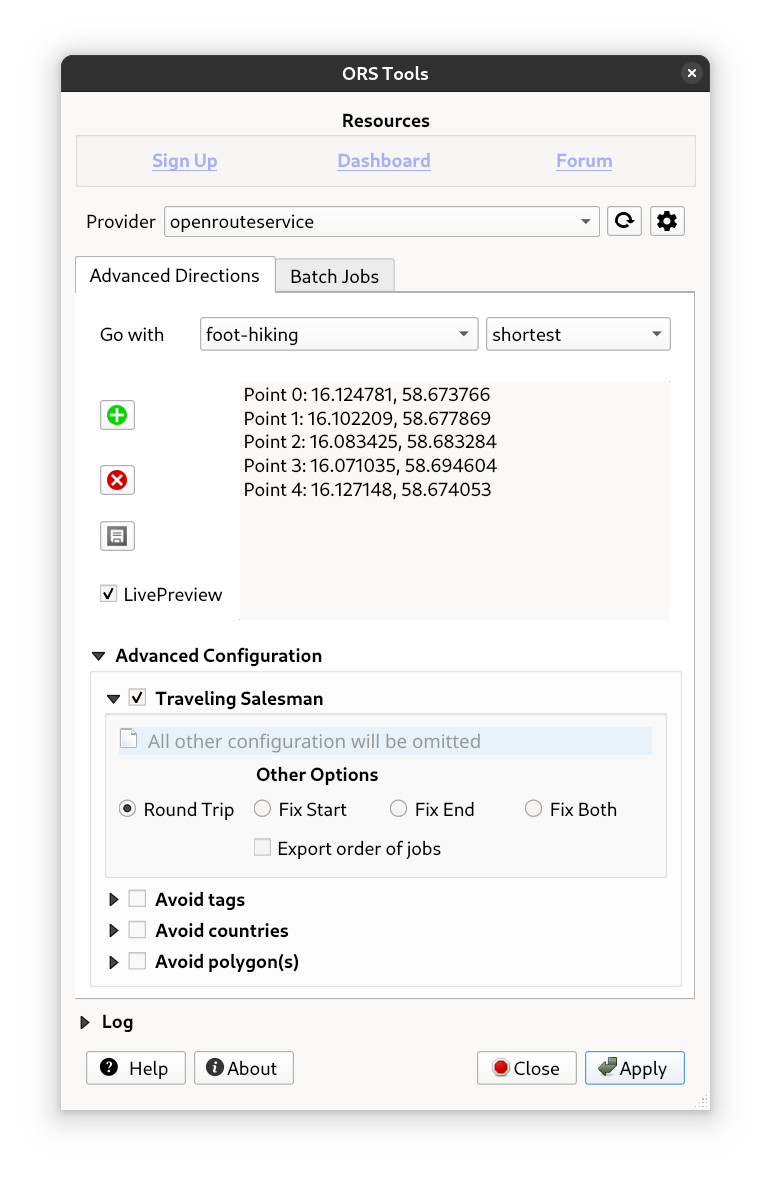
Fig. 17 Activate the traveling Salesman optimization#
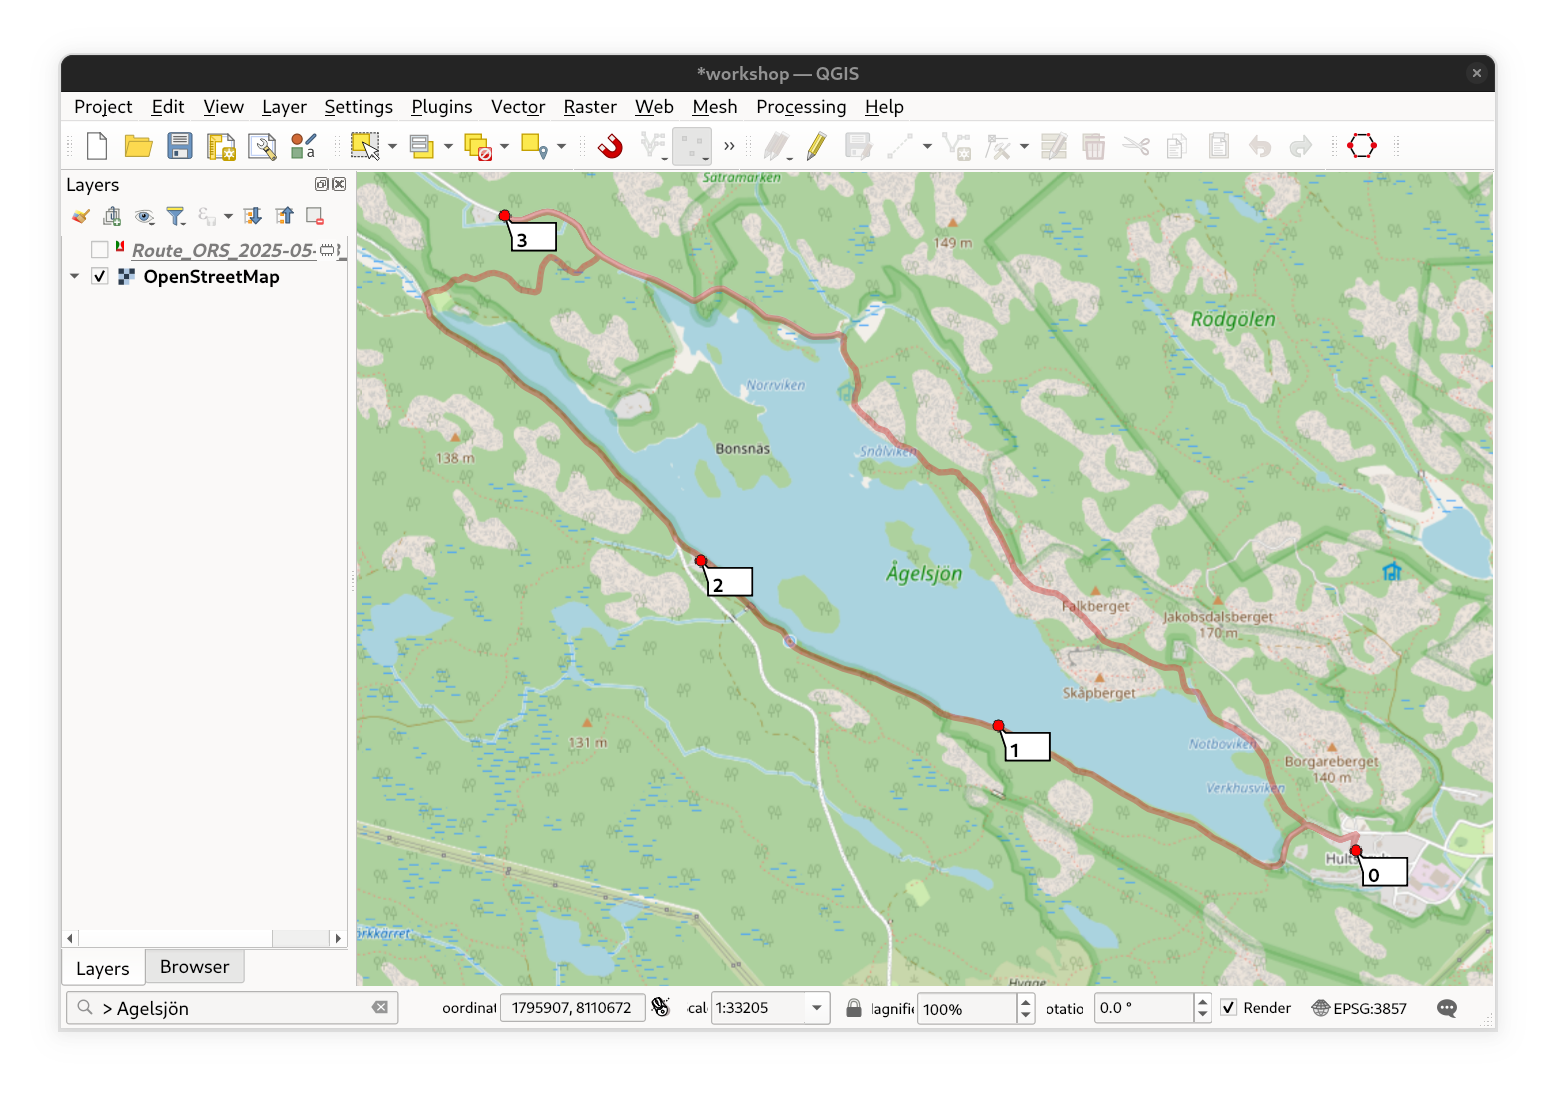
Fig. 18 The optimized route (round trip)#
Bears!#
There was a public service announcement: there are bears in the area! Beware — they’ve been spotted in the north of the
lake, which is where we definitely want to avoid going. Luckily, ORSTools offers an Avoid Polygons feature that lets
us handle exactly this kind of situation. You can simply draw a polygon on a new layer covering the area where the
bears have been reported, then specify that layer in the Advanced Settings under the avoid polygons option. The route
will automatically adapt to avoid this dangerous zone. See the example data here.
Please bear in mind:
The avoid polygons option does not work when the Traveling Salesman option is activated. So, make sure to disable Traveling Salesman before setting your polygon in the settings.
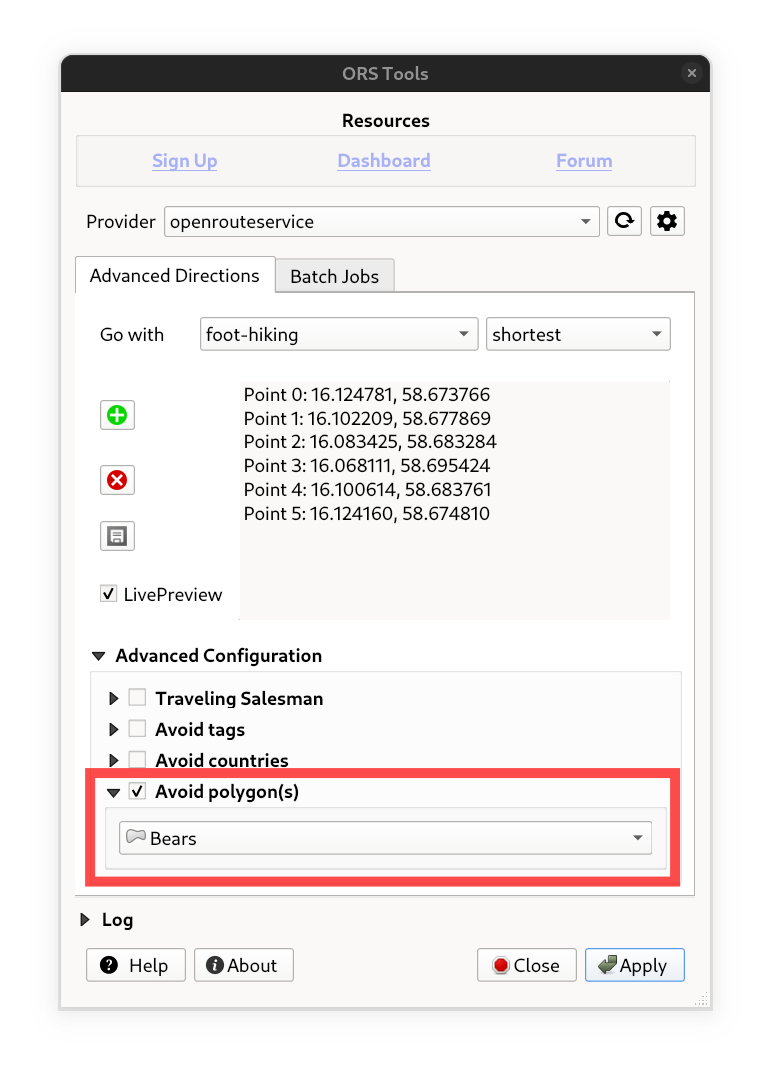
Fig. 19 The avoid areas option in the advanced configuration#
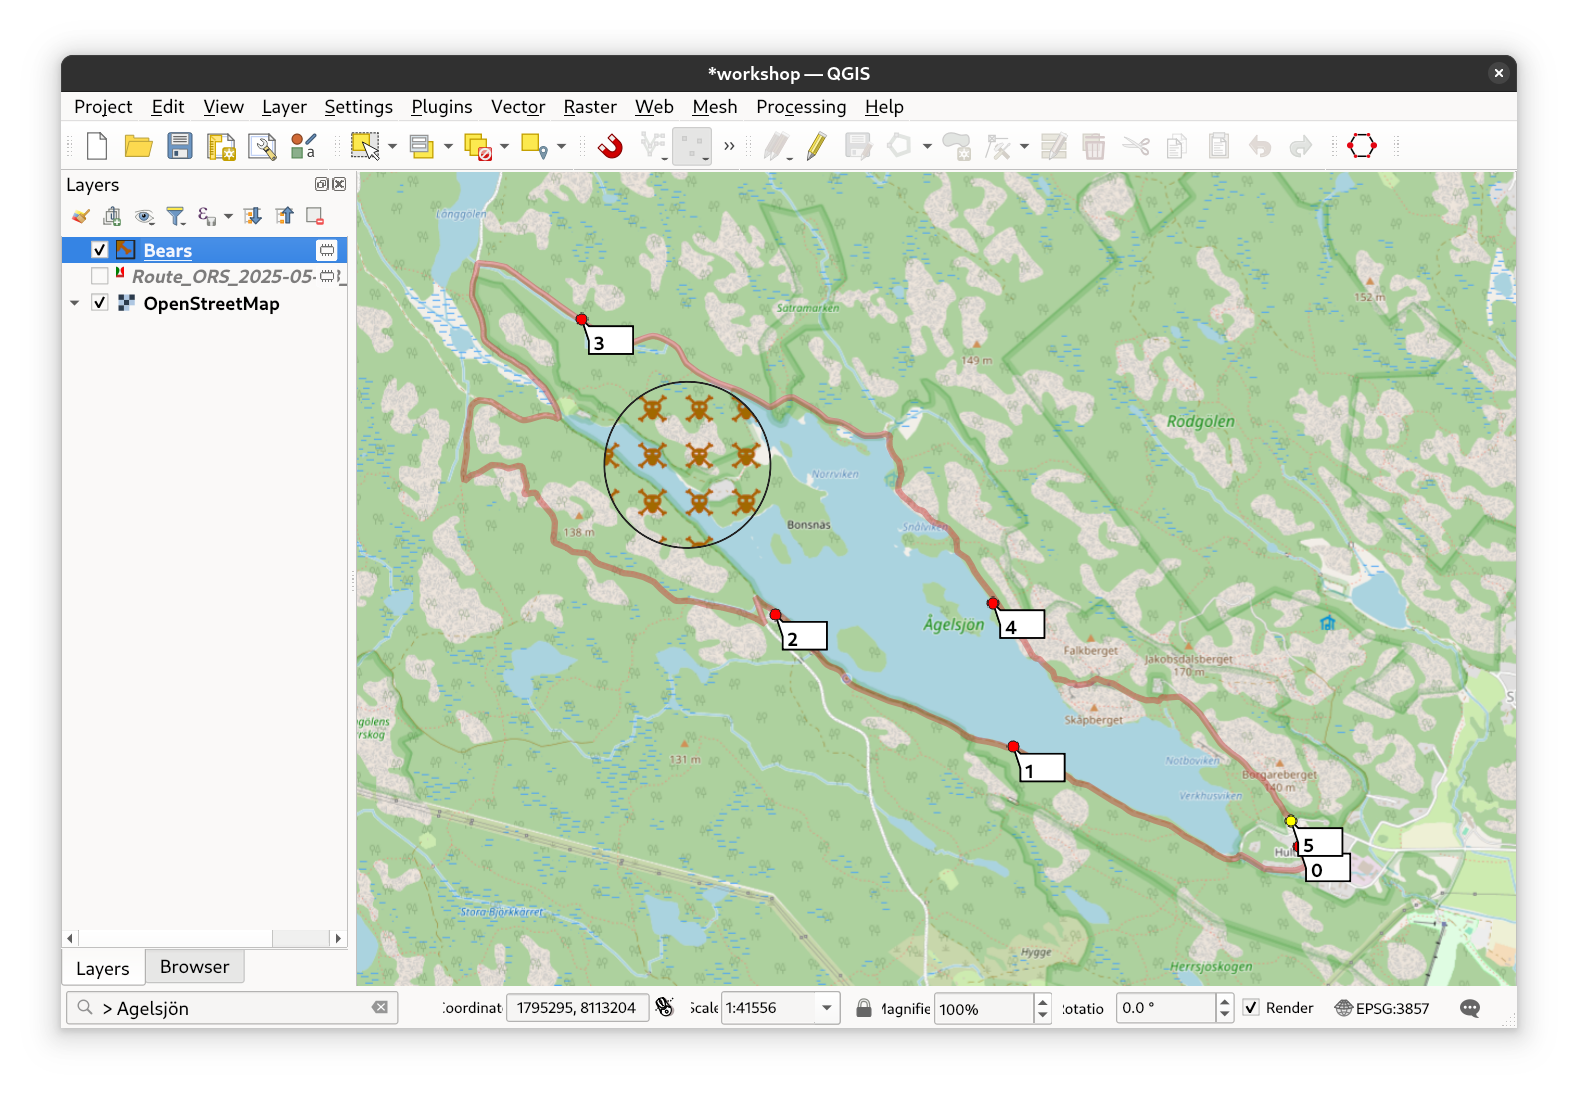
Fig. 20 The bear avoiding route#
Save Points to Layer#
Before we wrap up the route planning and calculate our final route, be sure to save your waypoints for future use. Simply click the Save Vertices button, and all your points will be saved to a layer you can access and edit later on.
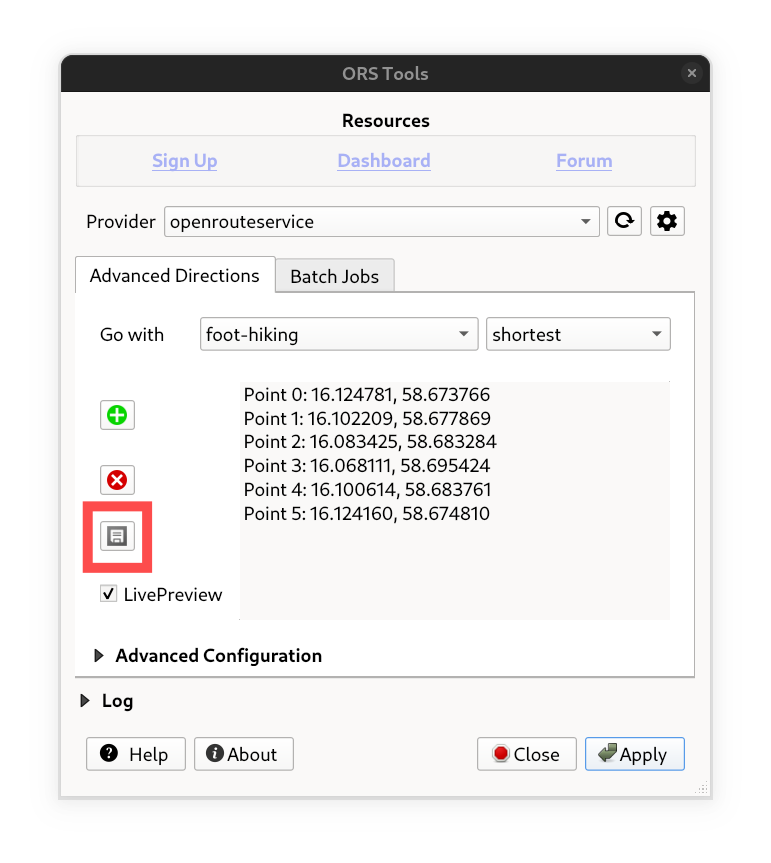
Fig. 21 Save those points#
There You Go#
Now hit that Apply button again to calculate and generate your final hiking route around the lake!
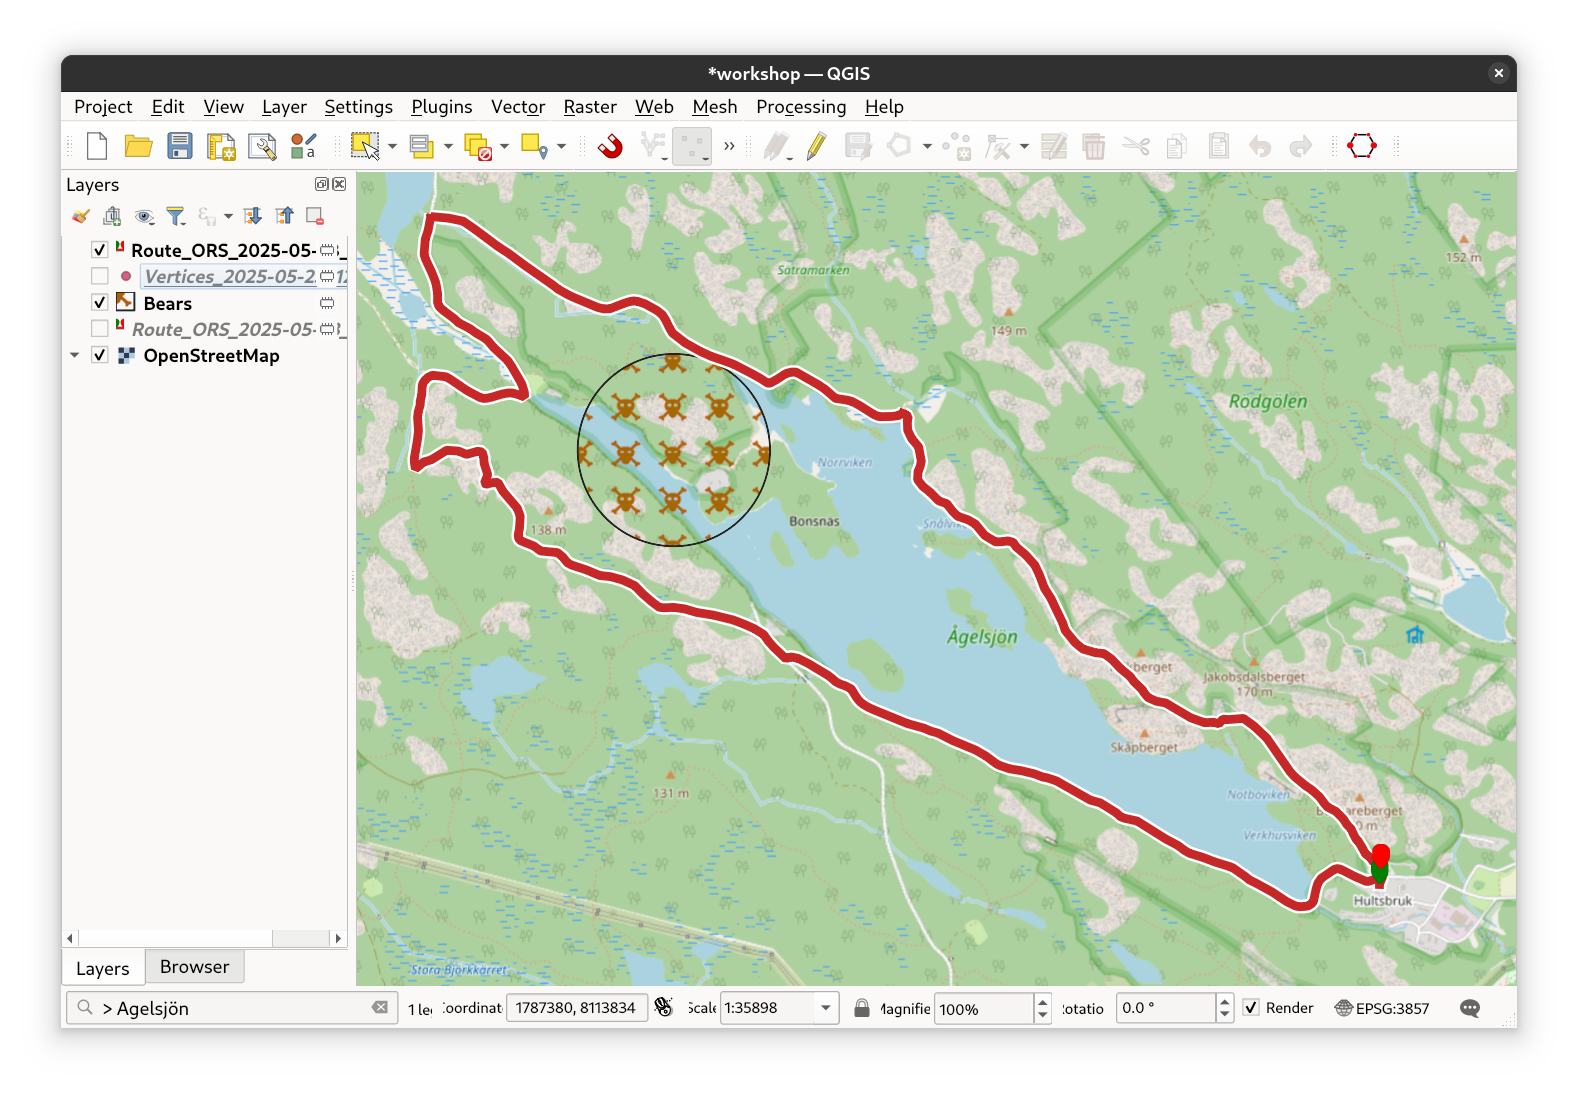
Fig. 22 The final result, avoiding the bears#